Welcome to my F-ing life!


Monday, February 14, 2011

Beef Negimaki


Have I mentioned I love Chinese and Japanese food?

Of course I have. How could I not?

I used to work in an office in a strip mall.  On the other end of the strip mall, there was a little Japanese / Teppanyaki place I used to frequent quite often.  It's been awhile since I've been there. Too long, in fact. They had fantastic Bento box lunches, sushi, and I remember this is where I tried Negimaki for the very first time.

Negimaki, also called negima, is simply strips of beef marinated in a teriyaki sauce and rolled with scallions. Traditionally, the beef is broiled, but you can certainly grill it or sear it in a frying pan just as easily.

I make these little bundles of happiness when I need a nice and easy dinner. Serve them with rice and a veggie and you'll have happy tummies all around.


Beef Negimaki

serves 4 portions


12 scallions with ends trimmed
1 pound boneless beef top round steaks
3/4 cup classic stir fry sauce
3 tablespoons sugar
3 tablespoons water


Place each steak between sheets of plastic wrap and gently pound until 1/8 inch thick.

Lay 3 scallions down the length of each piece of meat; tightly roll up from the long side. Cut alternately straight across and diagonally in 2" pieces. Secure with toothpick. Place in large zip-lock bag.

Stir sauce, sugar and water in bowl until sugar dissolves. Add 1/3 cup of this mixture to Ziploc bag; refrigerate 30 minutes to one hour.

Heat skillet over medium high heat. Add negimaki for about 4-5 minutes, turning to brown on all sides. Discard marinade.

Microwave remaining sauce to use for dipping.

Friday, February 11, 2011

Serious Mushroom Lover Soup


So you love mushrooms? I know I do. Any kind, size, shape...I love them all. Out of the four of us (Papa Bear, Drama Queen, Little Lawyer and myself), Papa Bear took the longest to covert to a Mushroom Lover.  My girls loved mushrooms straight out of the gate! Him...not so much. Until about six months ago, the only way I could get him to eat a mushroom was to sneak it in to a dish finely diced.

Something in him, a 'fungus switch' if you will, flipped and now...he can't get enough of the little guys! I love when that happens. It happens to everybody at some point. You dislike a certain food (not necessarily mushrooms), and then one day...

...when you least expect it...

...'IT' happens...


BAM! Boing! BOOM!

You like this food! You really like this food! Where've you been all my life?

I have made this soup many times for the Mushroom Lovers Club. Papa Bear has heard us slurp and moan and complain of a full tummy every time we have devoured it. It's one souper-hearty soup, lemme tell ya! Not for the faint of heart Mushroom Lover. But they could certainly eat it too.

Best part is...you can use any variety of mushroom you prefer. I have favorites, of course, but sometimes the ones that make it into the soup are the ones that cost less, if you catch my drift.

Mmm, Mmm, gooooooood!


Serious Mushroom Lover Soup

serves 10-12 (and makes souper leftovers the next day!)


2 tablespoons vegetable oil
4 cloves minced garlic
1 2inch piece fresh ginger root, peeled and minced
4 cups chicken broth
3 tablespoons soy sauce
2 tablespoons fish sauce
2 portobello mushrooms, cleaned and sliced
1 pint cremini mushrooms, cleaned and sliced
1 pint button mushrooms, cleaned and sliced
1 pint shiitake or oyster mushrooms, cleaned and sliced
1 small Napa cabbage shredded
1 large bunch bok choy chopped
2 carrots cut in matchsticks
1 bunch scallion thinly sliced
Dark sesame oil

Heat the oil in a large saucepan over medium heat and cook the garlic and ginger until browned.

Combine the broth, soy sauce, and fish sauce to the saucepan and bring to a simmer.

Add the remaining ingredients, except the scallions and sesame oil. Simmer for 30 minutes.

Add the scallions to the saucepan, remove from heat, and ladle into serving bowls. Drizzle a bit of sesame oil over the top of each serving.

Tuesday, February 8, 2011

Chicken Piccata


You gotta love the types of dishes that are interchangeable. You can do this dish with chicken or veal, and I think it (untraditionally, of course) would be rather tasty with a firm fish or even shrimp. It is also acceptable to use pork instead of chicken or veal. Vegetarians or vegans can prepare the dish using thin slices of tofu or eggplant. 

Piccata translates to piquant or piquancy, which (in one definition) means tart or zesty. Piccata does have a tart sauce, with traditional additions of lemon juice, white wine and capers. It’s also quite easy to prepare, especially in small batches. The dish takes about 20 to 30 minutes to make, so it's a speedy weeknight meal.


Pounding the meat to the desired thinness is probably the most time consuming process. Instead of spending more money at the grocery store for the already thin cutlets, I usually horizontally slice a  chicken breast in half and then pound it out to the thickness I want, usually about an 1/8 of an inch thick. You can reduce any chance of a flying chicken mess by placing the meet in a sealable plastic bag, or by putting it between two layers of plastic wrap.

If you want a good laugh, hand your kids the mallet and then let them do the flattening for you...hilarity will follow! Plus, it's a great way to have them (or you) work out any pent up aggression...

Seasoned and dredged chicken makes for sticky fingers.

Brown those birds, remove from pan and keep 'em warm while the rest of the magic happens.

Brown some shroomage - remove and set aside.

Add garlic and wine to the pan and reduce by about half.

Stir in broth-flour mixture, lemon juice and salt. Simmer and stir in parsley, capers and butter.

Bring chicken back to the party and heat through. We do have mushroom haters, so I only added the mushrooms to the party when those that do not like them were served. Otherwise, throw them in when you reintroduce the chicken.

Serve the chicken over pasta and smother with sauce!


Chicken Piccata

serves 4

1/3 cup all-purpose flour, divided
2 cups reduced-sodium chicken broth
1/2 teaspoon salt, divided
1/4 teaspoon freshly ground pepper
4 chicken cutlets, (3/4-1 pound total), trimmed
3 teaspoons extra-virgin olive oil, divided
1 10-ounce package mushrooms, sliced
3 large cloves garlic, minced
1/2 cup white wine
2 tablespoons lemon juice
1/4 cup chopped fresh parsley
2 tablespoons capers, rinsed
2 teaspoons butter
Hot cooked angel hair pasta

Bring a large pot of water to a boil. Add pasta and cook until just tender, 4 to 6 minutes or according to package directions. Drain and rinse.

Meanwhile, whisk 5 teaspoons flour and broth in a small bowl until smooth. Place the remaining flour in a shallow dish. Season chicken with 1/4 teaspoon salt and pepper and dredge both sides in the flour.

Heat 2 teaspoons oil in a large nonstick skillet over medium heat. Add the chicken and cook until browned and no longer pink in the middle, 2 to 3 minutes per side. Transfer to a plate; cover and keep warm.

Heat the remaining 1 teaspoon oil in the pan over medium-high heat. Add mushrooms and cook, stirring, until they release their juices and begin to brown, about 5 minutes. Transfer to a plate. Add garlic and wine to the pan and cook until reduced by half, 1 to 2 minutes.

Stir in the reserved broth-flour mixture, lemon juice and the remaining 1/4 teaspoon salt. Bring to a simmer and cook, stirring, until the sauce is thickened, about 5 minutes.

Stir in parsley, capers, butter and the reserved mushrooms. Measure out 1/2 cup of the mushroom sauce. Toss the pasta in the pan with the remaining sauce. Serve the pasta topped with the chicken and the reserved sauce.

Saturday, February 5, 2011

Easy Crab (or not) Stuffed Mushrooms


These are by far the easiest stuffed mushrooms I have ever made.

And I've made more than enough to fill...oh, say...the Titanic? Yeah. A lot.

Juicy and tasty, these will satisfy a crowd! A nice and easy appetizer for any type of occasion. You can make them ahead of time and refrigerate these until you need them.

I say "crab (or not)" simply because it's really up to you. You can (or not) use crab, shrimp, surimi, or no seafood at all and they'll still be fantastic.

You could use the stuffing and pile it into a couple of portabello mushroom caps, or use cremini mushrooms instead of button.

Clean your mushroom vessels of choice and pop out the stems.

Chop up those stems - waste not, want not!

Do the same with some scallions.

As well as some red bell pepper.

Melt some butter...

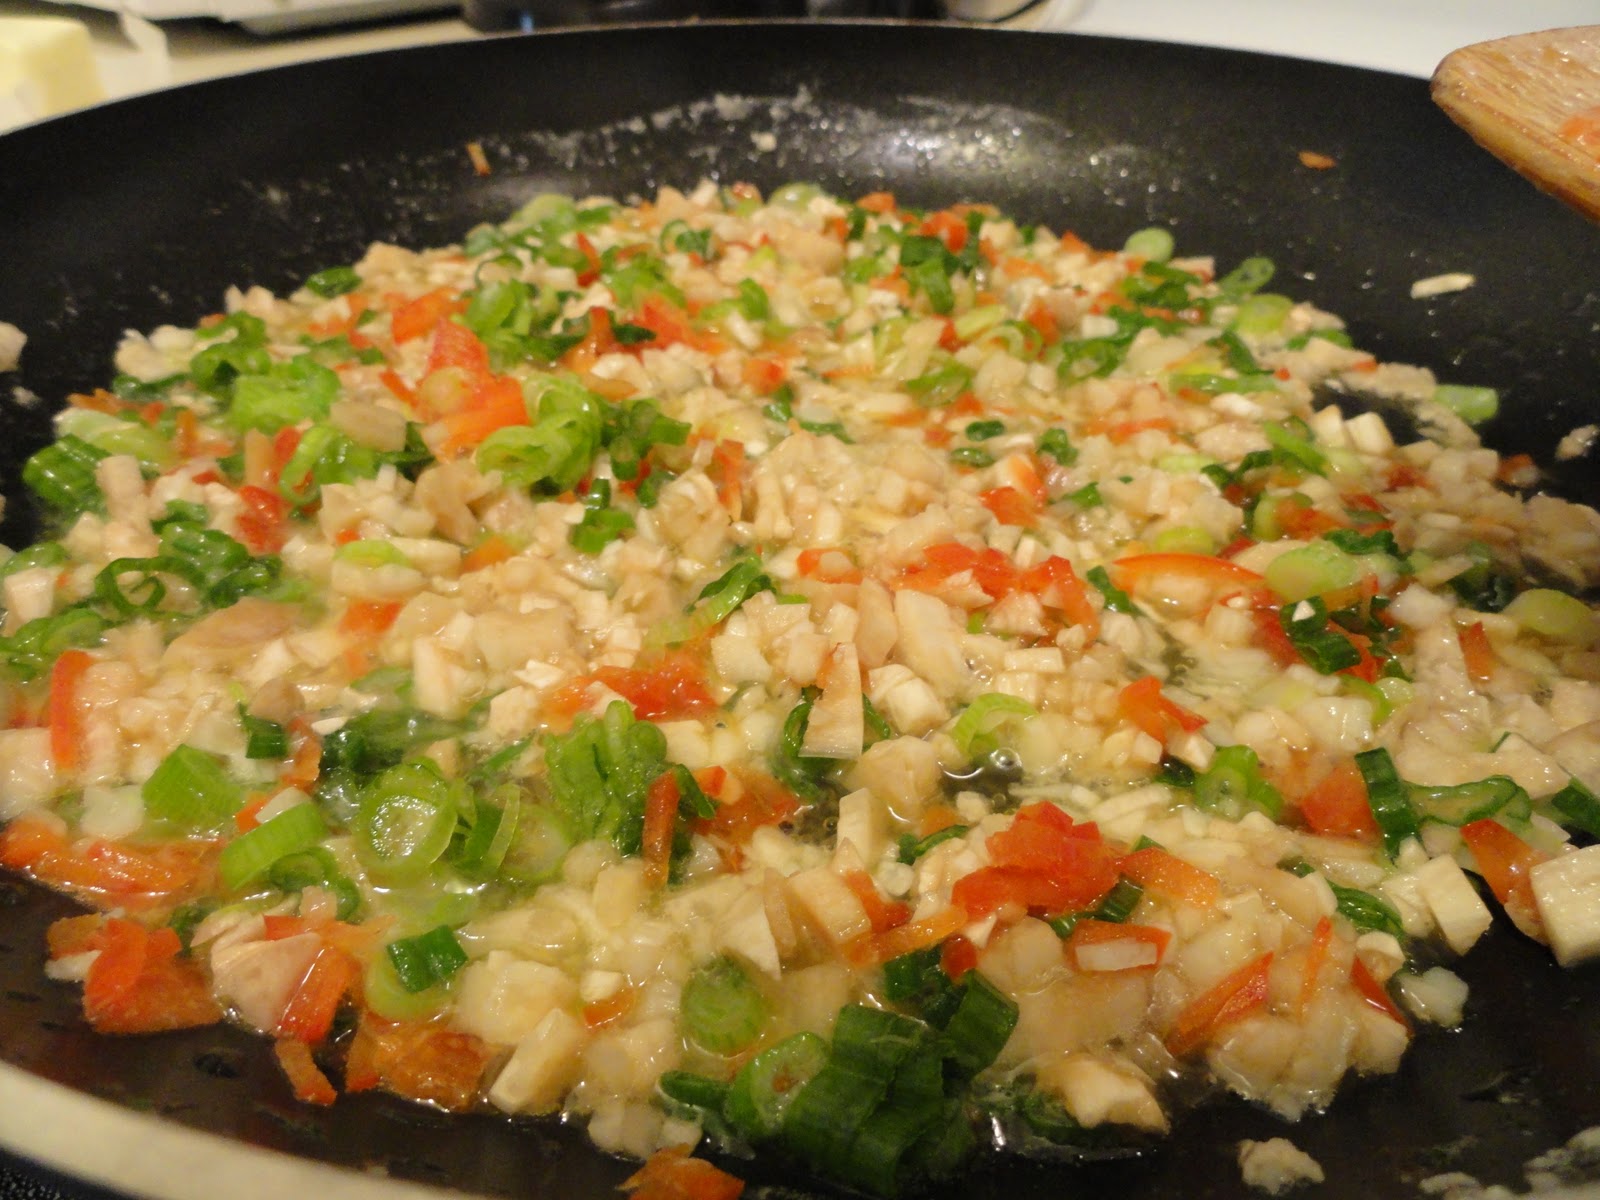
Add the stems, scallions and red pepper and cook down.

Cook until most of the butter as been absorbed and everything is tender.

Put some breadcrumbs in a bowl.

Toss in salt, pepper, cajun seasoning and parmesan cheese.

Add the cooked veggies and some crab meat.

Stir it all up.

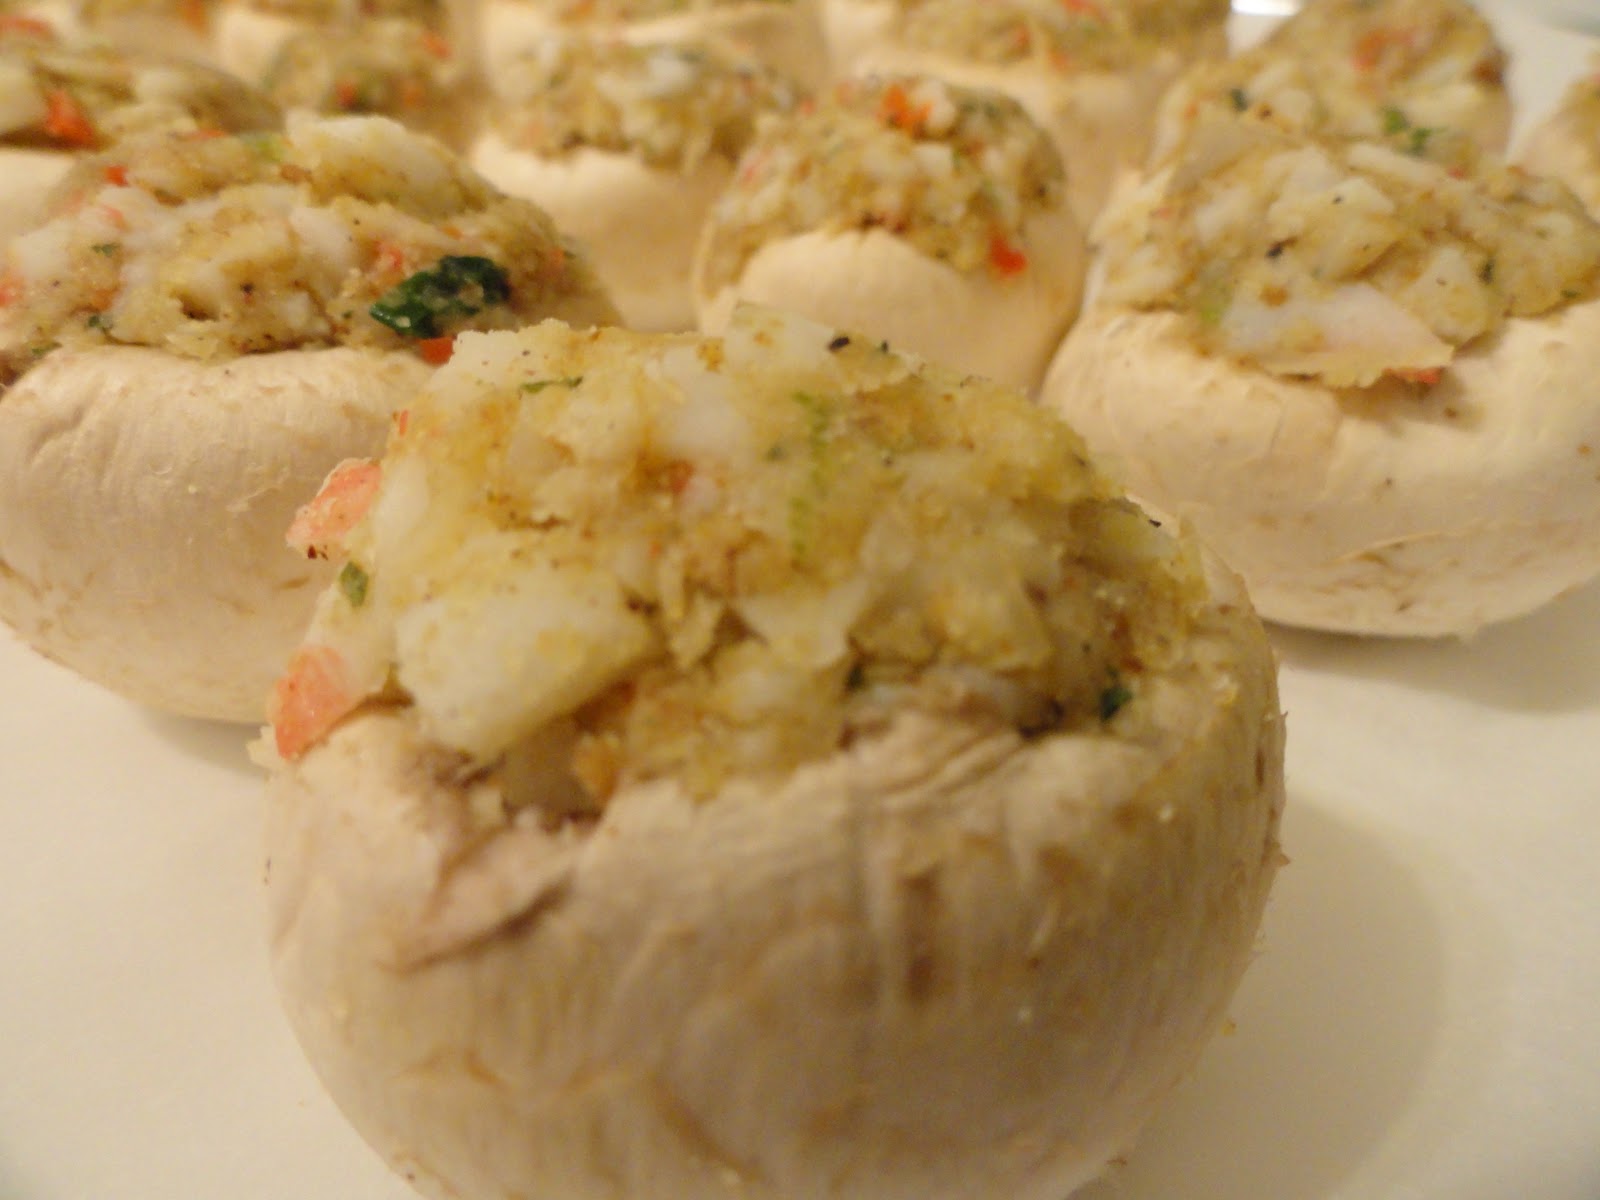
Stuff those caps to maximum capacity!

Put 'em on a baking sheet and drizzle each one with a little melted butter.

Top with a smattering of Parmesan.

After 20 loooong minutes, you are finally rewarded...


Crab (or not) Stuffed Mushrooms

Makes about 20-24

1 pound large button mushrooms
6 tablespoons butter, divided
3 green onions, minced
3 tablespoons minced red bell pepper
6 ounces crab meat
1 cup bread crumbs
1/4 teaspoon salt
1/4 teaspoon Cajun seasoning blend
1/8 teaspoon pepper
2 tablespoons Parmesan cheese

Wash and trim the end of stems from mushrooms. Pop remaining stem out. Chop stems and set aside.

Spray a shallow baking dish or rimmed sheet pan with butter-flavored spray or grease with butter.

Melt 4 tablespoons butter in skillet; add reserved chopped stems, minced green onions and red bell pepper. Cook until vegetables are tender.

Combine cooked ingredients with bread crumbs, crab meat, and seasonings.

Fill and pack each mushroom, piling the filling up. Melt remaining 2 tablespoons butter; drizzle over mushrooms. Sprinkle each mushroom with a little Parmesan cheese.

Bake at 350° for 20 minutes.

Wednesday, February 2, 2011

Buttermilk "Thick" Biscuits


Are you a "Fluffy" or a "Flaky"?

What? Too personal?

Um, okay....

What I should have said is, "How do you prefer your biscuits? Fluffy or flaky?"

Better?

Thought so.

I like them either way. My personal favorites are the one that come with your Kentucky Fried Chicken meal. But I would not pass up a Hungry Jack, either. How much fun is it to pull apart those layers, am I right?

These are simple buttermilk biscuits that you can make in one pan. No rolling or cutting needed. I love simplicity like this. They are basically cooked in a pan of butter and come out of the oven....neither fluffy or flaky! These could be coined the "Thick Biscuit" honestly. They are buttery, very dense and very filling. These went great with our New Year's dinner.

Little Lawyer drizzled honey on top of hers. She saved the leftovers so she could have them that way for breakfast the next morning...

Add butter to 8x8 pan and wait for oven to preheat.

When preheating, place pan in oven for about a minute so the butter melts.

Add flour to a mixing bowl.

Add some sugar.

Then some salt.

Then some baking powder.

Buy then, the butter should be melty. I like to make sure there are some browned bits of butter in the pan for more flavor!

Pour some buttermilk.

Slowly add it to your flour mixture while stirring.

Stir together until just combined.

Flour your fingers and pat that bad boy down into the pan.

Use a spatula or scraper to "perforate" into nine biscuits.

All proportioned! Stick 'em in the hot box...

Out comes nine perfect biscuits!

Serve warm as-is, with a drizzle of honey, with butter, or with honey butter.


Buttermilk Thick Biscuits

Makes 9, but can easily be doubled and baked in a 9x13 pan for 20 minutes.

1/2 stick butter
1 1/4 cup flour
2 teaspoons sugar
2 teaspoons baking powder
1 teaspoon Kosher salt
2/3 cup buttermilk
(If you wanted to make these herbed, you could also add a teaspoon or two of your favorite dried herb to compliment the meal you’re serving this with!)

Preheat oven to 450 degrees.

Slice up butter and place it on the bottom of an 8x8 inch dish. When the oven reaches 450 degrees place dish of butter in oven to melt for one minute.

Meanwhile combine flour, sugar, baking powder, and salt. Little by little, slowly pour buttermilk into the mixture until just blended.

Remove melted butter from oven and spread biscuit dough over melted butter. Use your flour-dusted fingers. Using a spatula or dough cutter/scraper, cut the dough into 9 even squares.

Bake for 12-15 minutes.